ASTA localization system: Difference between revisions
From Rsewiki
(Created page with "Back to ASTA == Description == @todo == How to use == @todo == Calibration == @todo == Installation == @todo") |
No edit summary |
||
| (One intermediate revision by one other user not shown) | |||
| Line 2: | Line 2: | ||
== Description == | == Description == | ||
Optitrack | |||
@todo | @todo | ||
| Line 13: | Line 15: | ||
@todo | @todo | ||
== Installation == | == Installation (as performed in August 2020) == | ||
=== Mount cameras on joints and joints on clamps === | |||
Make sure that the camera is not upside-down. | |||
=== Prepare 16 safety ropes === | |||
# Cut to the right length | |||
# Use a lighter at both ends | |||
# prepare 8-knots as in rock climbing | |||
=== Mount cameras on truss and wire them with the two switches === | |||
Mount the 16 cameras in the corners and at each 1/4 of the edges. | |||
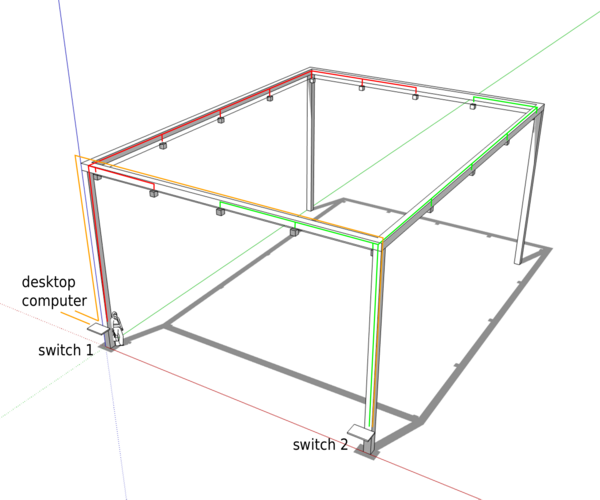
Use the safety ropes, and wire them to the two switches as below. | |||
[[File:Asta optitrack wiring.png|600px]] | |||
=== Orient cameras and adjust focus === | |||
Once the setup is up-and-running, | |||
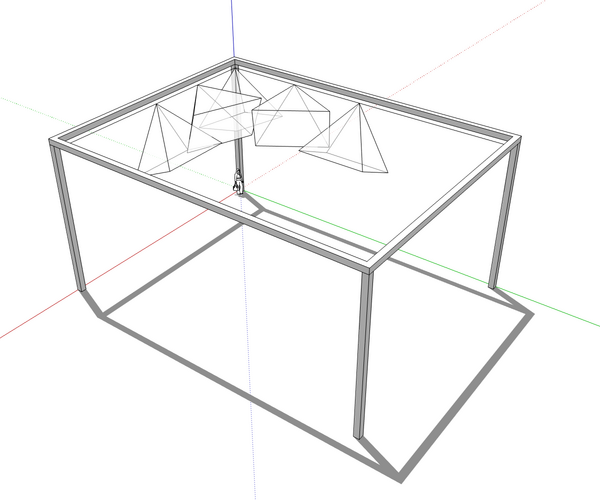
adjust the focus of each camera using a marker | |||
at 2/3 of the working distance. | |||
Skype and screen sharing may be helpful. | |||
[[File:Asta optitrack.png|600px]] | |||
==== In the corners ==== | |||
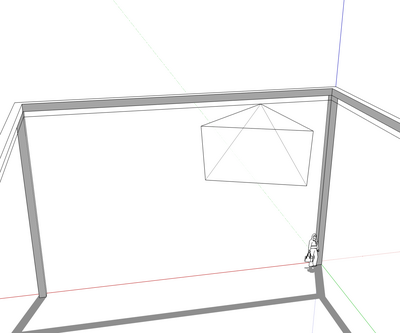
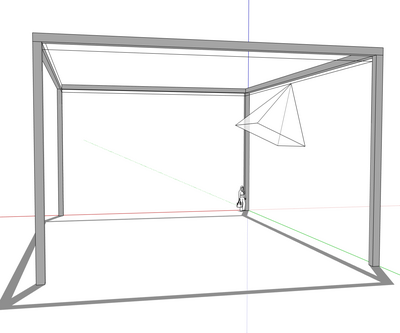
The bottom of FoV is parallel to the long edges, and the bottom right corner is vertical. | |||
[[File:Asta optitrack type1.png|400px]] | |||
==== At 1/4 of a short edge ==== | |||
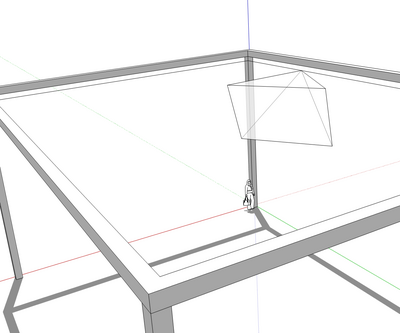
The top of the FOV is horizontal, and the camera points toward the center. | |||
[[File:Asta optitrack type2.png|400px]] | |||
==== At 1/2 of a short edge ==== | |||
The bottom of the FOV is vertical, and the camera aims downward. | |||
[[File:Asta optitrack type3.png|400px]] | |||
==== At 1/4 of a long edge ==== | |||
The top of the FOV is horizontal, and the camera points toward the center. | |||
[[File:Asta optitrack type4.png|400px]] | |||
==== At 1/2 of a long edge ==== | |||
The bottom of the FOV is vertical, and the camera aims downward. | |||
[[File:Asta optitrack type5.png|400px]] | |||
Latest revision as of 15:55, 29 January 2021
Back to ASTA
Description
Optitrack
@todo
How to use
@todo
Calibration
@todo
Installation (as performed in August 2020)
Mount cameras on joints and joints on clamps
Make sure that the camera is not upside-down.
Prepare 16 safety ropes
- Cut to the right length
- Use a lighter at both ends
- prepare 8-knots as in rock climbing
Mount cameras on truss and wire them with the two switches
Mount the 16 cameras in the corners and at each 1/4 of the edges. Use the safety ropes, and wire them to the two switches as below.
Orient cameras and adjust focus
Once the setup is up-and-running, adjust the focus of each camera using a marker at 2/3 of the working distance. Skype and screen sharing may be helpful.
In the corners
The bottom of FoV is parallel to the long edges, and the bottom right corner is vertical.
At 1/4 of a short edge
The top of the FOV is horizontal, and the camera points toward the center.
At 1/2 of a short edge
The bottom of the FOV is vertical, and the camera aims downward.
At 1/4 of a long edge
The top of the FOV is horizontal, and the camera points toward the center.
At 1/2 of a long edge
The bottom of the FOV is vertical, and the camera aims downward.
