Regbot: Difference between revisions
From Rsewiki
No edit summary |
|||
| (198 intermediate revisions by 2 users not shown) | |||
| Line 1: | Line 1: | ||
= | REGBOT is a small robot designed for exercises for our linear control 1 course (PID control) ([http://www.dtu.dk/english/Service/Phonebook/Person?id=14453 author]). | ||
[[file:foto_of_Alba_40.png | 250px]] | |||
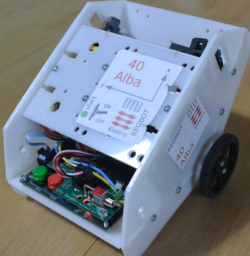
Figur 1. Version 2 of Regbot. | |||
== Overview == | |||
This section is intended for users. | |||
[[Getting started]] with REGBOT GUI. | |||
[[ | [[User interface]], how to configure the robot using the Regbot client. | ||
[[Control]] overview gives some information on control possibilities. | |||
[[Mission]], how to write a mission. | |||
[[Regbot calibration]] for better performance. | |||
[[Regbot maintenance]] for longer life. | |||
[[Regbot GUI]] installation. | |||
[[Regbot hardware board]]. | |||
== Install notes == | |||
This section is primarily installation notes and more detailed descriptions not usually needed by the end-user. | |||
[[Regbot command interface]] - command list. | |||
[[Software installation]] on REGBOT (Arduino) and tool-chain - Linux | |||
[[Regbot old stuff]] | |||
Latest revision as of 14:17, 17 October 2024
REGBOT is a small robot designed for exercises for our linear control 1 course (PID control) (author).
Figur 1. Version 2 of Regbot.
Overview
This section is intended for users.
Getting started with REGBOT GUI.
User interface, how to configure the robot using the Regbot client.
Control overview gives some information on control possibilities.
Mission, how to write a mission.
Regbot calibration for better performance.
Regbot maintenance for longer life.
Regbot GUI installation.
Install notes
This section is primarily installation notes and more detailed descriptions not usually needed by the end-user.
Regbot command interface - command list.
Software installation on REGBOT (Arduino) and tool-chain - Linux
