Raspberry Pi directory structure for Robobot: Difference between revisions
No edit summary |
|||
| Line 86: | Line 86: | ||
[[File:winscp_jack_connect.png | 500px]] | [[File:winscp_jack_connect.png | 500px]] | ||
Fill the dialogue with your IP address, username and password (and save for next time), then log in. | |||
With a bit of luck, you should get something like | |||
[[File:winscp_jack.png | 500px]] | |||
=== on Linux (and Mac) === | |||
On Linux-based platforms, you could use SSHFS, a way to mount a remote directory on your own platform. | |||
In a terminal, create an empty directory and mount the remote directory: | |||
chr@mars:~$ '''mkdir jjj''' | |||
chr@mars:~$ '''sshfs local@192.168.2.151: jjj''' | |||
local@192.168.2.151's password: | |||
chr@mars:~$ '''cd jjj''' | |||
chr@mars:~/jjj$ '''ls''' | |||
'''Documents Downloads git mission_start.bash Music on_reboot.bash rebootinfo.txt svn Video''' | |||
In the 'sshfs', remember the ':' after the IP address. | |||
Revision as of 11:46, 25 January 2024
Back to Robobot B
Contact with robot
When you start the robot, and the robot has contact with the wifi net (DTU Secure), then its IP address is shown on the small display (above the name and battery voltage).
This IP (e.g. 10.197.218.202) gives access to an SSH (secure shell).
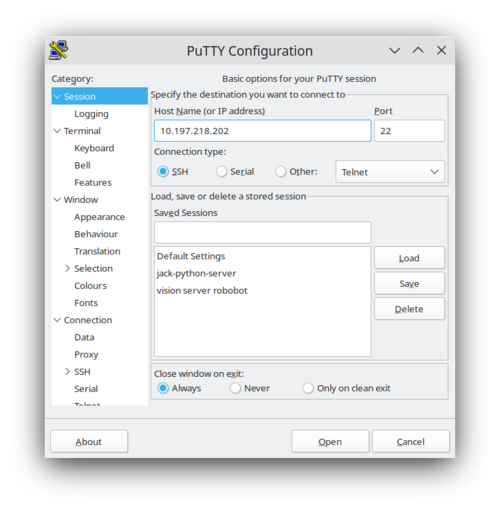
On your PC, start Putty (install if you don't have it)
Putty (Linux version), but Putty is also available for Windows and Mac.
Insert the IP, select the connection type (SSH), then port should default to 22.
Press 'open' to connect.
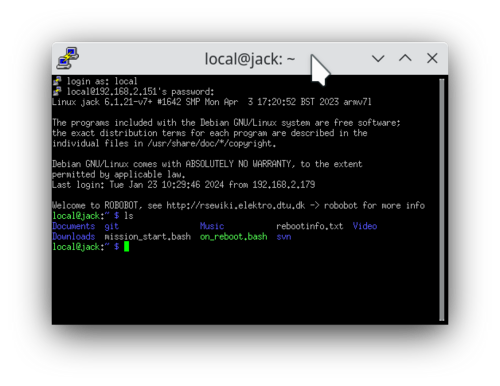
Connection to robot Jack (with another IP)
The connection will ask for username and password.
- username is 'local'
- password is (ask)
Then, you should see the files in the home directory (as shown above).
Alternative connection
On all platforms, a terminal window (command prompt in Windows) and an SSH connection can be started as
$ ssh local@192.168.2.151
local@192.168.2.151's password:
Linux jack 6.1.21-v7+ #1642 SMP Mon Apr  3 17:20:52 BST 2023 armv7l

The programs included with the Debian GNU/Linux system are free software;
the exact distribution terms for each program are described in the
individual files in /usr/share/doc/*/copyright.
Debian GNU/Linux comes with ABSOLUTELY NO WARRANTY, to the extent
permitted by applicable law.
Last login: Thu Jan 25 11:08:11 2024 from 192.168.2.179

Welcome to ROBOBOT, see http://rsewiki.elektro.dtu.dk -> robobot for more info
local@jack:~ $ ls
Documents  Downloads  Music  Video  git  mission_start.bash  on_reboot.bash  rebootinfo.txt  svn
local@jack:~ $
Directory structure
On the Raspberry, the main directories and files are:
/home/local/
+-git        - Directory for libraries available from a GIT repository (mostly Teensy/Arduino libraries).
|  +-CLI11   - Directory with command line interface library CLI (from GitHub)
+-svn        - Directory for software from the subversion repository (Robobot-specific software).
|  +-regbot  - Directory for the Teesny software (firmware); this part is called Regbot.
|  |  +- regbot_gui Debug app for Regbot.
|  |  +- regbot     The firmware source code.
|  +-robobot        Directory for the Robobot-specific code.
|  |  +- setup      Directory with some default configuration files.
|  |  +- raubase    The basic Raspberry Pi software for Robobot.
|  |  |  +-src      Source code
|  |  |  +-build    Build directory with Makefile
|  |  |  |  +-log*  Directory for data-monitoring logfiles
|  |  |  |  Makefile     Compile directives
|  |  |  |  robot.ini    Configuration and calibration file
|  |  |  |  raubase      Compiled base mission control software
|  |  |  CMakeList.txt   Directives to generate a Makefile using cmake
|  |  +- ip_disp   Small app to update the IP address of the Raspberry.
|  |     log_ip_dist.txt Logfile for IP and temperature monitoring
|  +-log     - Directory with logfiles from ip_disp (IP, users and CPU temperature)
on_reboot.bash  - Script to start applications that should start after a reboot (ip_disp)
The easy way to work with files on the robot is to mirror the disk to your local PC
On Windows
On Windows use 'winscp' (install if not there)
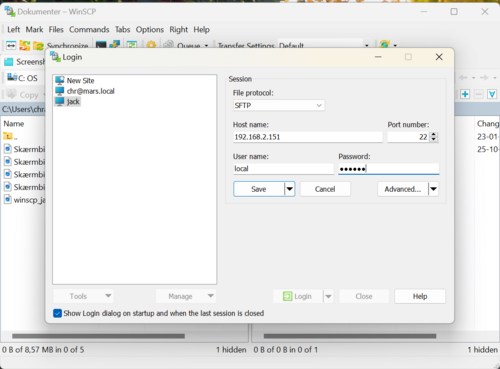
When you start winscp, you will get something like:
Fill the dialogue with your IP address, username and password (and save for next time), then log in.
With a bit of luck, you should get something like
on Linux (and Mac)
On Linux-based platforms, you could use SSHFS, a way to mount a remote directory on your own platform.
In a terminal, create an empty directory and mount the remote directory:
chr@mars:~$ mkdir jjj
chr@mars:~$ sshfs local@192.168.2.151: jjj
local@192.168.2.151's password:
chr@mars:~$ cd jjj
chr@mars:~/jjj$ ls
Documents  Downloads  git  mission_start.bash  Music  on_reboot.bash  rebootinfo.txt  svn  Video
In the 'sshfs', remember the ':' after the IP address.


