Arduino and Teensy libraries: Difference between revisions
From Rsewiki
No edit summary |
No edit summary |
||
| Line 18: | Line 18: | ||
[[file:arduino-library-manager-MPU.png | 400px]] | [[file:arduino-library-manager-MPU.png | 400px]] | ||
[[file:arduino-library-manager.png | 400px]] | [[file:arduino-library-manager.png | 400px]] | ||
== Board select == | |||
Select the Teensy 4.1 board (tool->board->Teensy->4.1). | |||
Select the port on which the robot is connected - easier to connect the robot first. | |||
Revision as of 12:58, 5 July 2024
Back to Basebot
Installation of Arduino and Teensy support
- Install the newest Arduino - see https://www.arduino.cc/en/software.
- Add the Teensy hardware support - see https://www.pjrc.com/teensy/td_download.html, including
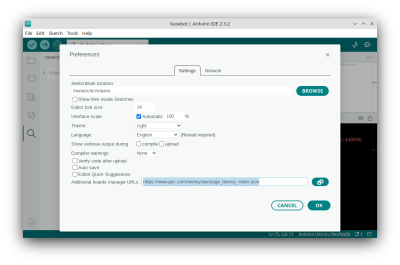
- Add https://www.pjrc.com/teensy/package_teensy_index.json to the file->preferences
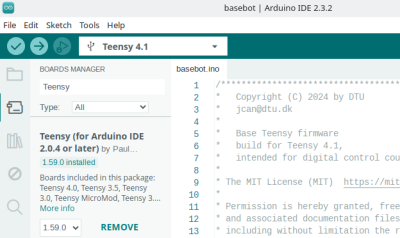
- In the boards manager (Tools->Boards->Boards manager), search for Teensy and install support for Teensy boards.
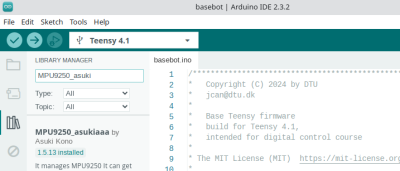
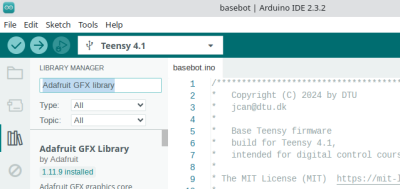
- In the Library manager (Tools->Manage libraries), search for "MPU9250_asukiaaa" and "Adafruit GFX library" and install both, including dependencies. These are used to interface the IMU and support for the small display.
Board select
Select the Teensy 4.1 board (tool->board->Teensy->4.1).
Select the port on which the robot is connected - easier to connect the robot first.


