Import code to Visual Studio: Difference between revisions
| Line 35: | Line 35: | ||
Using PlatformIO "QUICK ACCESS" -> "PIO Home" -> "Libraries" to add the following libraries: | Using PlatformIO "QUICK ACCESS" -> "PIO Home" -> "Libraries" to add the following libraries: | ||
MPU9250_asukiaaa | |||
Adafruit GFX library | Adafruit GFX library | ||
[[file: | [[file:MS_Visual_Studio_Code_library_import_2.png | 500px]] | ||
Type the name of the library; there are too many to browse. | Type the name of the library; there are too many to browse. | ||
| Line 44: | Line 44: | ||
Click on the library to add the library to the project. | Click on the library to add the library to the project. | ||
[[file: | [[file:MS_Visual_Studio_Code_library_import_3.png | 500px]] | ||
The the same with the other library. | |||
[[file: | [[file:MS_Visual_Studio_Code_library_import_1.png | 500px]] | ||
Revision as of 16:38, 29 August 2024
Back to Basebot
import code
Visual studio can import an Arduino project.
This will make a copy of the Basebot code as a new PlatformIO project.
Open the "Visuel Studio Code" and press the PlatformIO icon ![]() .
.
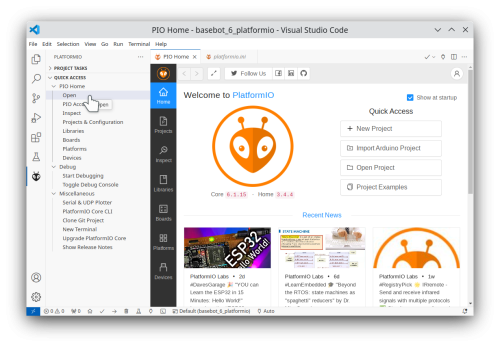
Using PlatformIO "QUICK ACCESS" -> "PIO Home" -> "Open" and here press "Import Arduino project"
Select Teensy 4.1 as the board type:
The browse to where you saved the Basebot code:
Press "import"
You now get something like this:
Note that the project gets a name with a timestamp and "Teensy 4.1" (in the side panel). This is important if you have imported it multiple times or want to find the code copy.
The file browser shows the configuration file "platformio.ini"; here, we must add the needed libraries.
Add Arduino Libraries
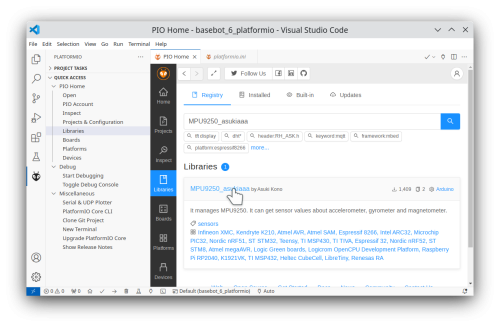
Using PlatformIO "QUICK ACCESS" -> "PIO Home" -> "Libraries" to add the following libraries:
MPU9250_asukiaaa
Adafruit GFX library
Type the name of the library; there are too many to browse.
Click on the library to add the library to the project.
The the same with the other library.


